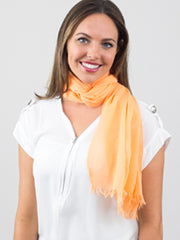
Scarf Tying – How To Tie Scarves

|

|

|

|

|

|

|

|

|

|
Hello there! Welcome to The Knot Library. Lets learn how to tie a scarf, are you ready to knot, twist, tie, tuck, loop, braid, fold, and fluff with Scarves Dot Net? We compiled over 50 (and counting!) different ways to tie a scarf, so chances are we have a new knot or two for you!
How to Use Scarves.net
How does The Knot Library work, you ask? There’s no Dewey Decimal System here. 😉 On the left side of your screen, simply find the type of scarf you want to learn more about. Next, select a knot or click the parent category such as “Bandana Scarves” to see all the knot options available. Once you choose a knot, you will be taken to a video and step by step instructions with pictures to guide you! Watch, read, rewind, repeat, practice — and voilà! Now you know a new way to tie a scarf!
If you would like to see all of Scarves Dot Net’s knots in one spot, check out How To Tie A Scarf Master List. Need a new scarf? We’ve got new scarves coming in each month!
Need more help? Contact us and leave us a note, we’d love to hear from you!


